")
How To Make a Wooden Christmas Tree
Just follow the step by step instructions below to add some DIY to your holiday decor in just a few hours!

MATERIALS LIST
(3) 8’ – 2 x 4 boards
(1) 2X wood piece large enough for a 6” circle
(1) 4’ long hardwood dowel rod
(1) Bar Soap
TOOLS NEEDED
Measuring Tape | Square | Straight Edge | Pencil | Pinner Nail Gun | 1/2″ Forstner Drill Bit and Drill or Drill Press | Jigsaw or Bandsaw | Tablesaw | Router with Round Over Bit or Sander | Long Clamp
INSTRUCTIONS

Step 1: Rip (14) ¼” thick strips out of the 2x4s
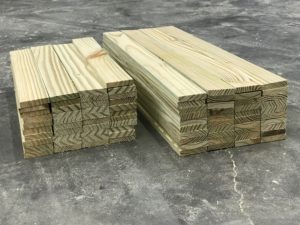
Step 2: Cut (40) pieces at 16” and (40) more at 12”
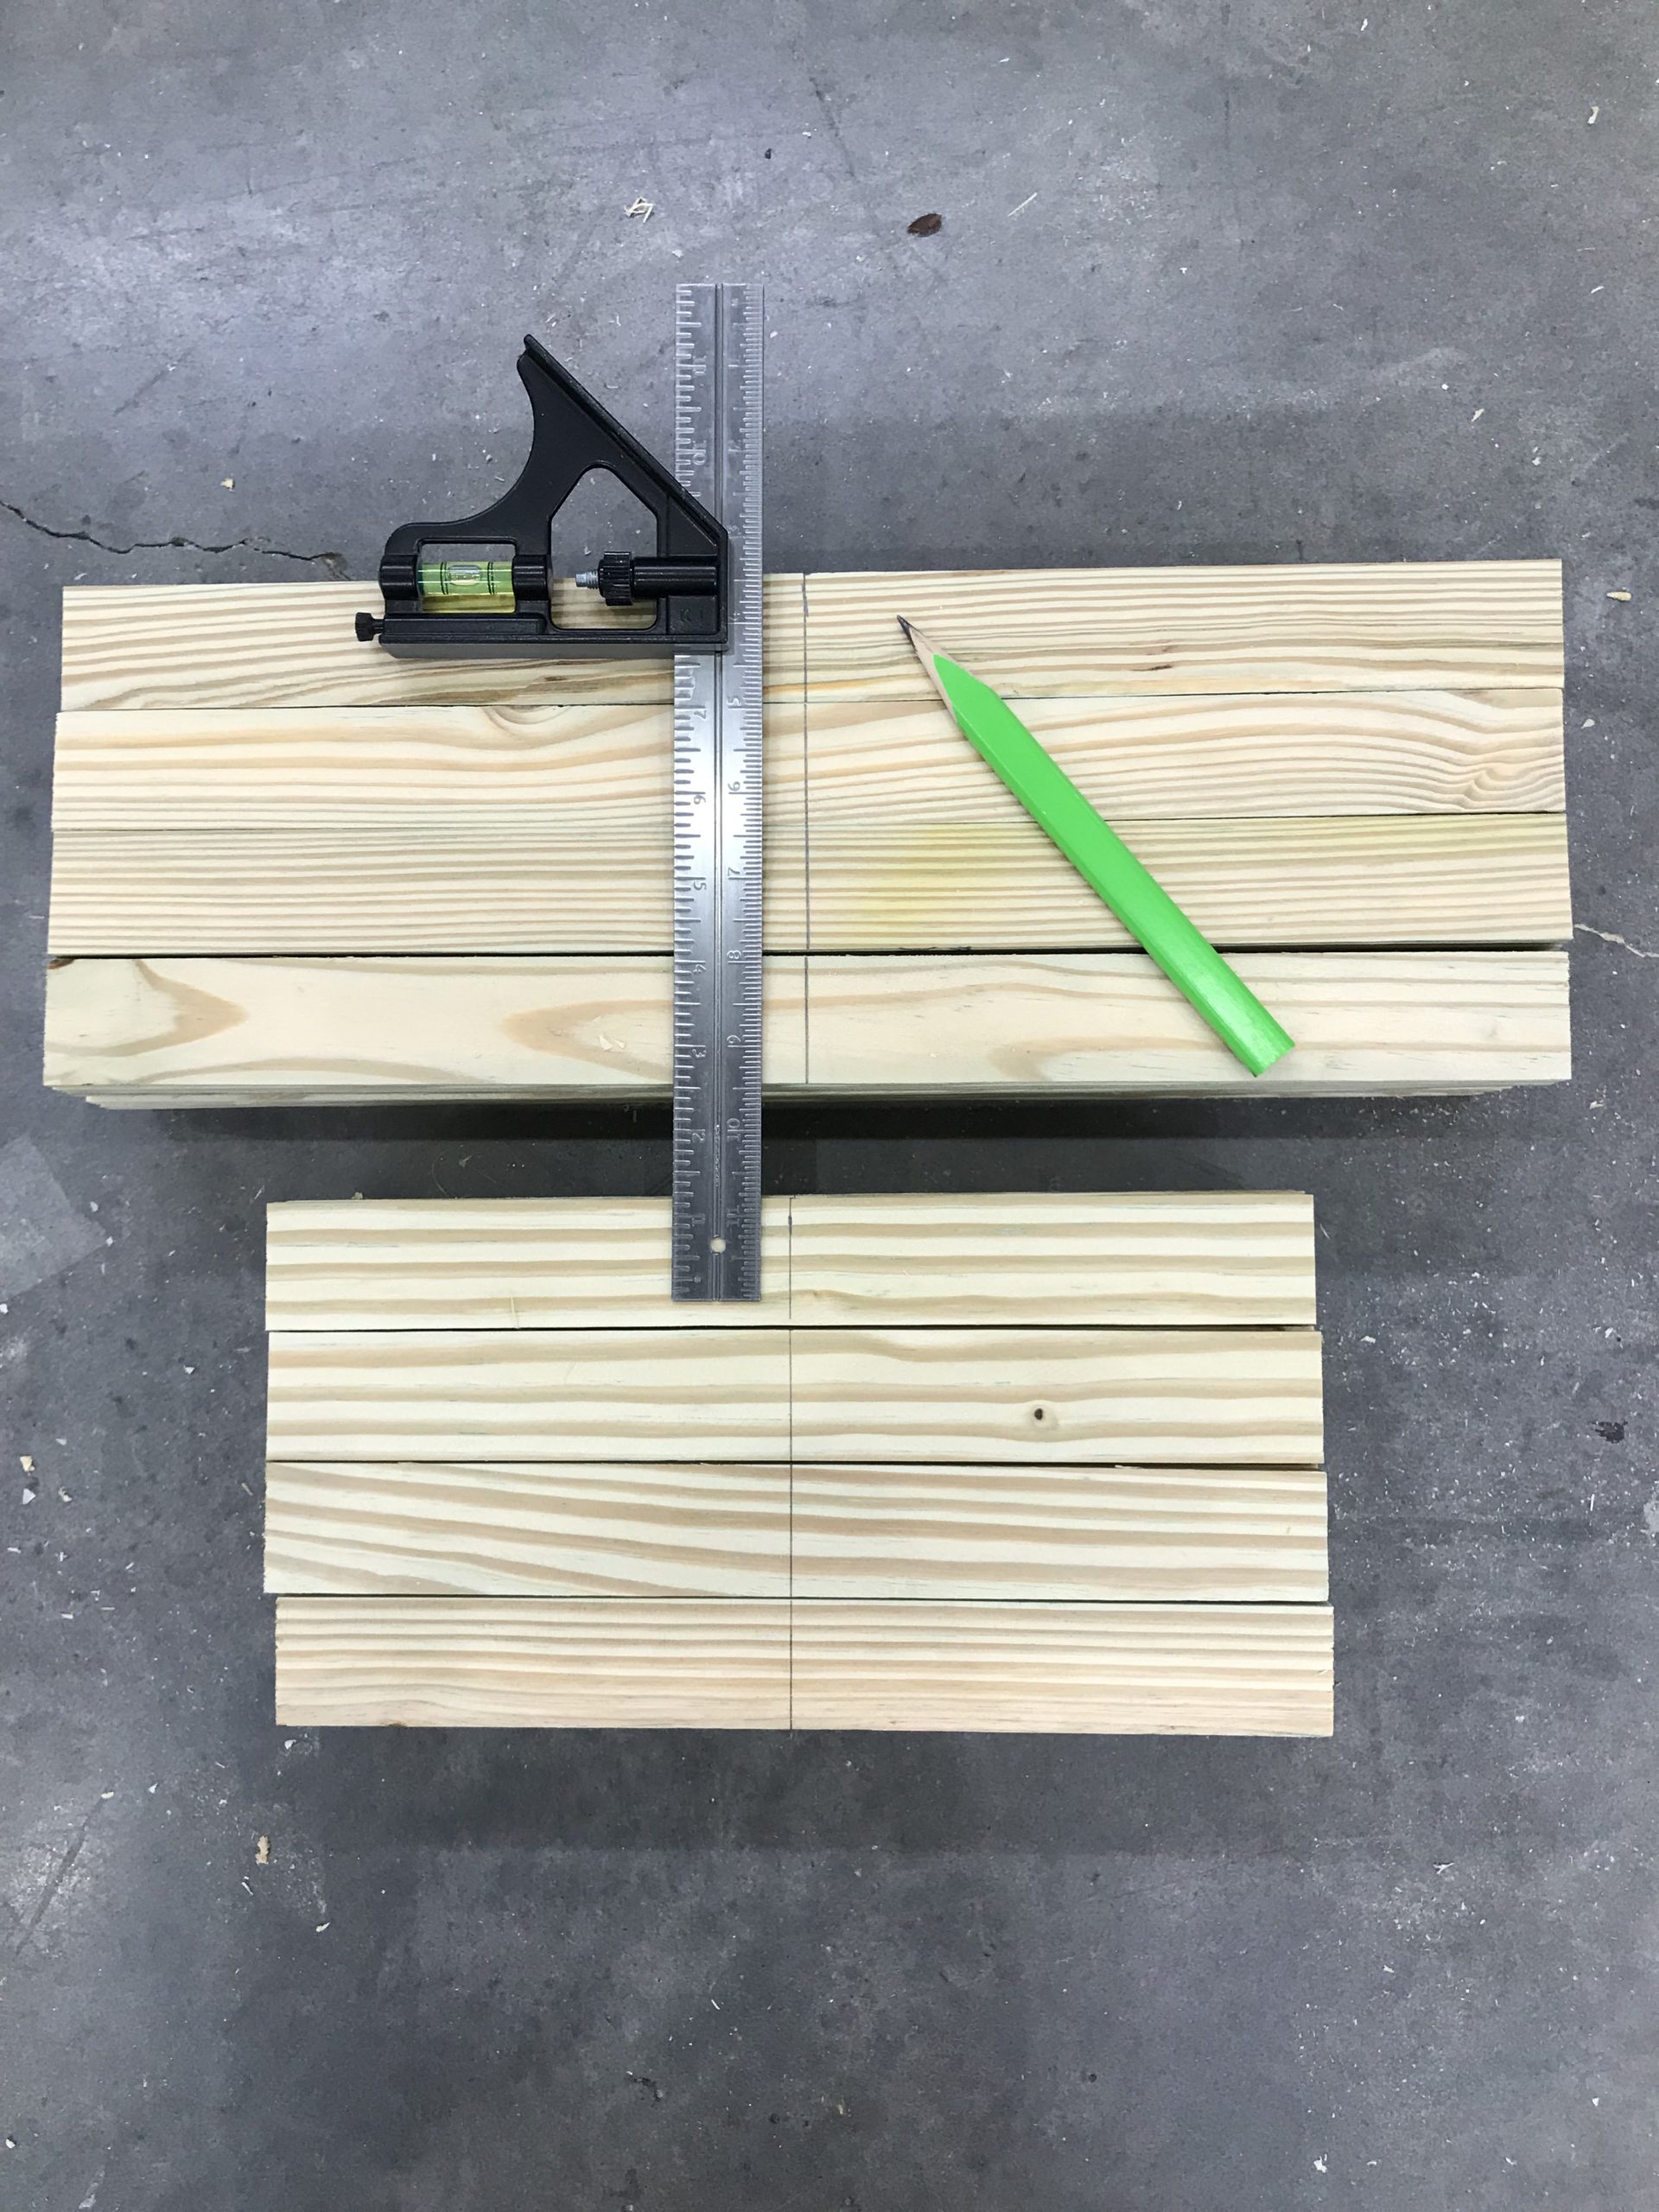
Step 3: Mark the centerline of all the pieces
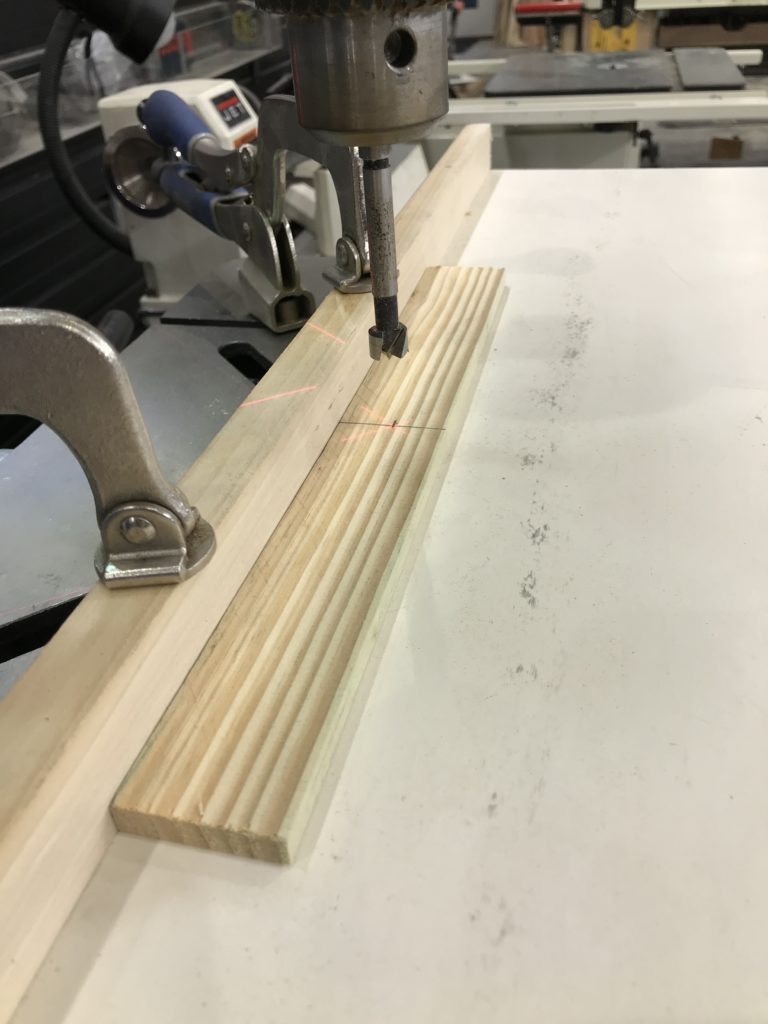
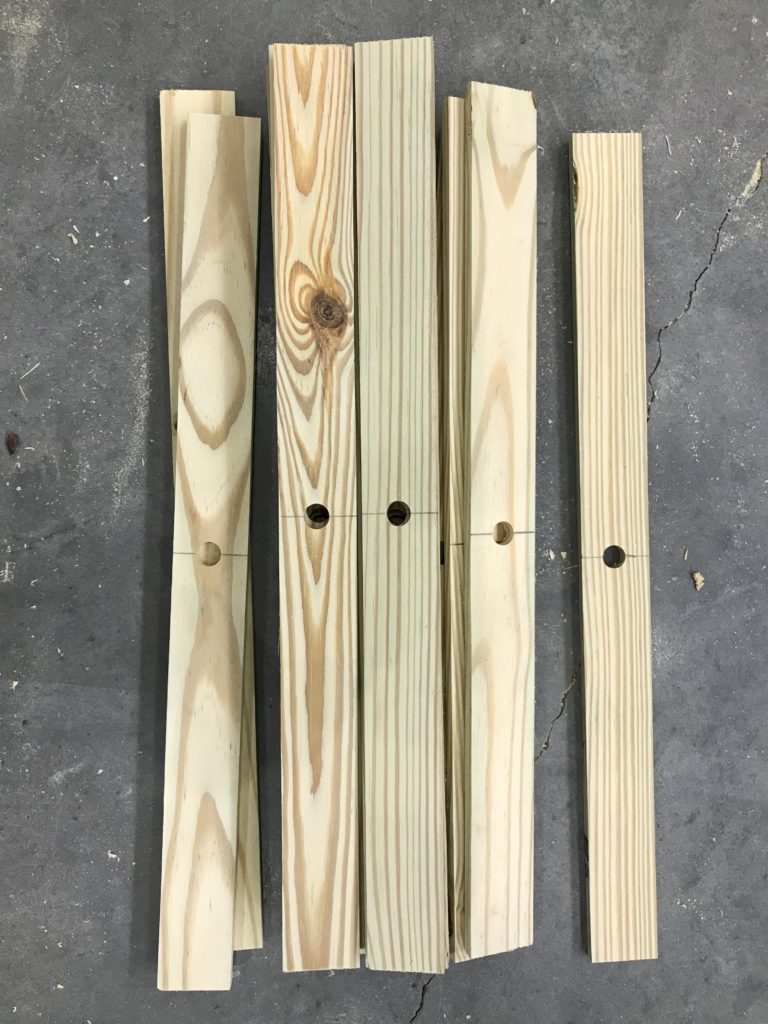
Step 4: With a drill press or drill and ½” forstener bit, drill the center of every slat of wood. Using a fence guide will give the most consistent results.

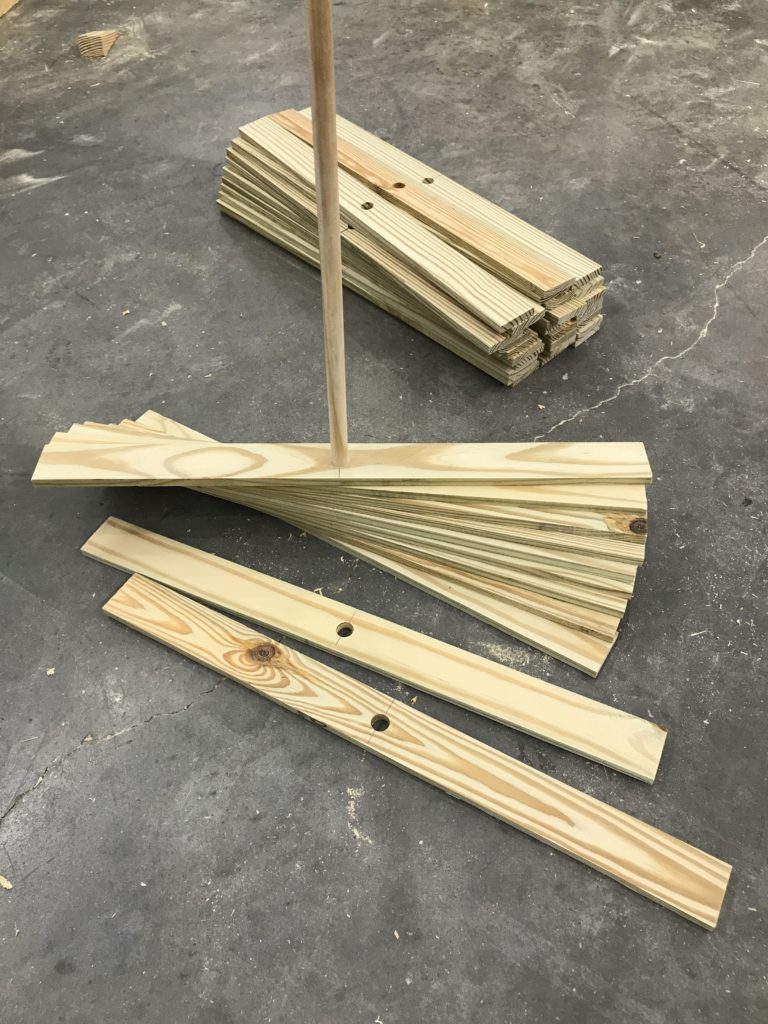
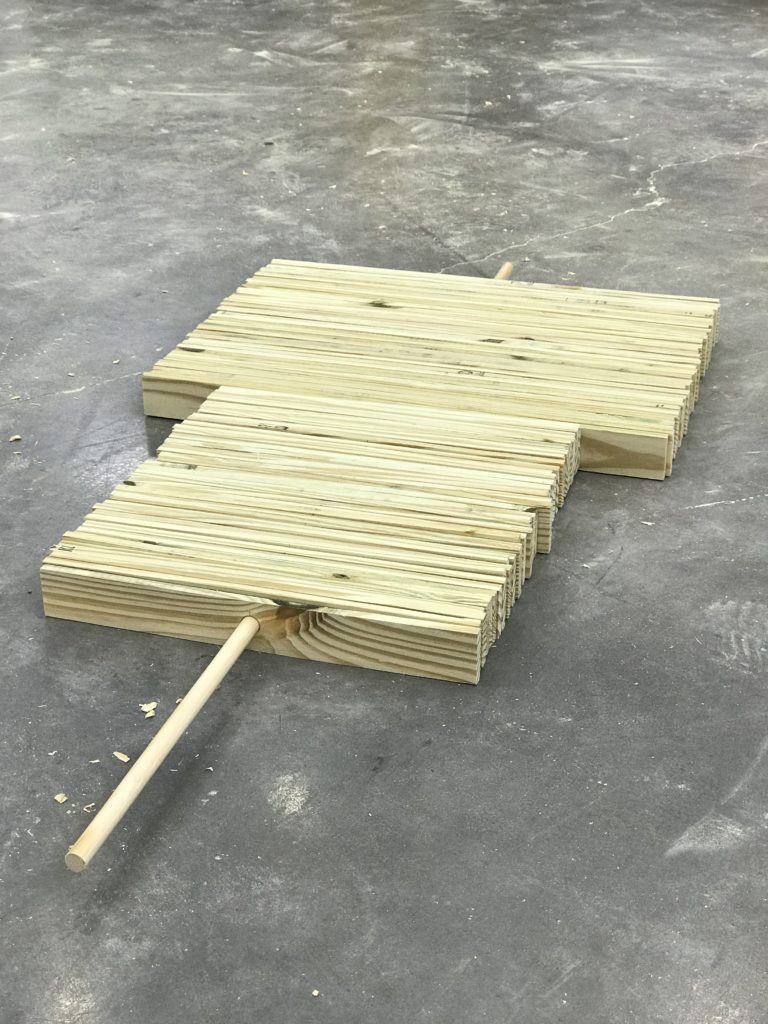
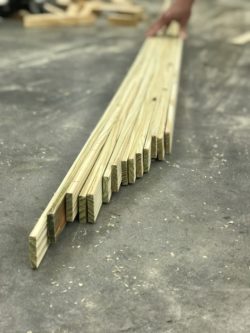
Step 5: Coat the dowel rod with soap and slide all the wood slats on with all like pieces together.

Step 6: With the extra wood left in the 2×4 and small extra wood piece for the 6” circle, cut out the pieces at dimensions shown (rectangle 5″x3.5″, trapezoid 3″x4″, circle with 6″ diameter).
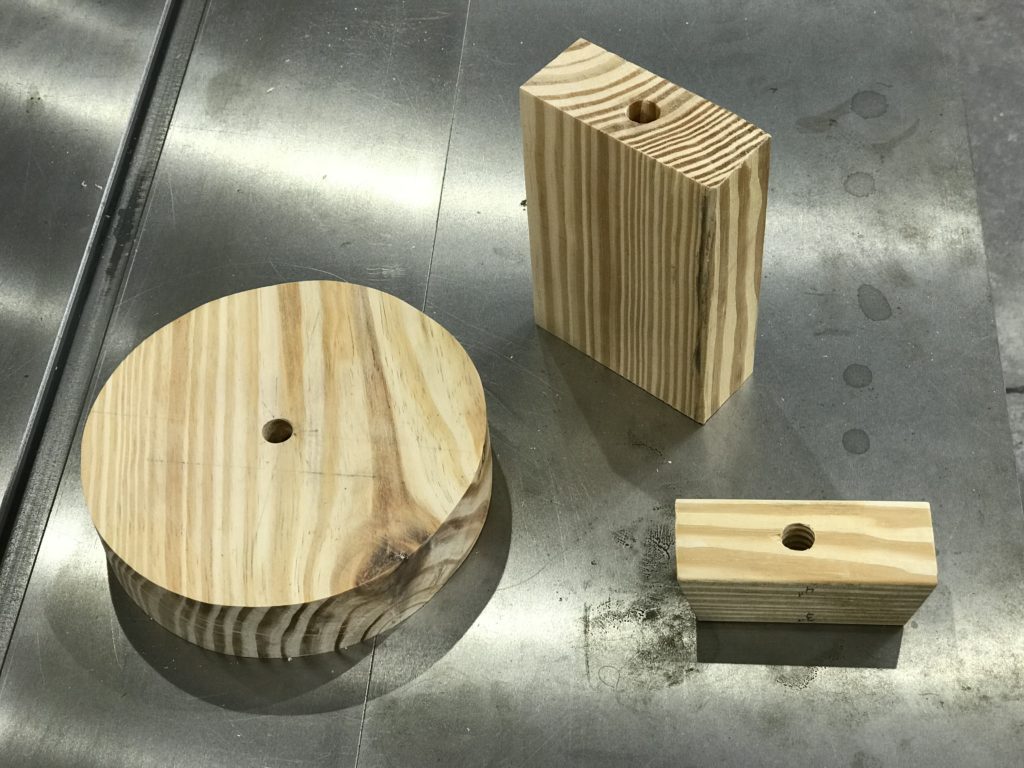
Step 7: Drill a ½” hole 1” deep in the large rectangle and circle. Cut the hole all the way through the smallest piece shown.
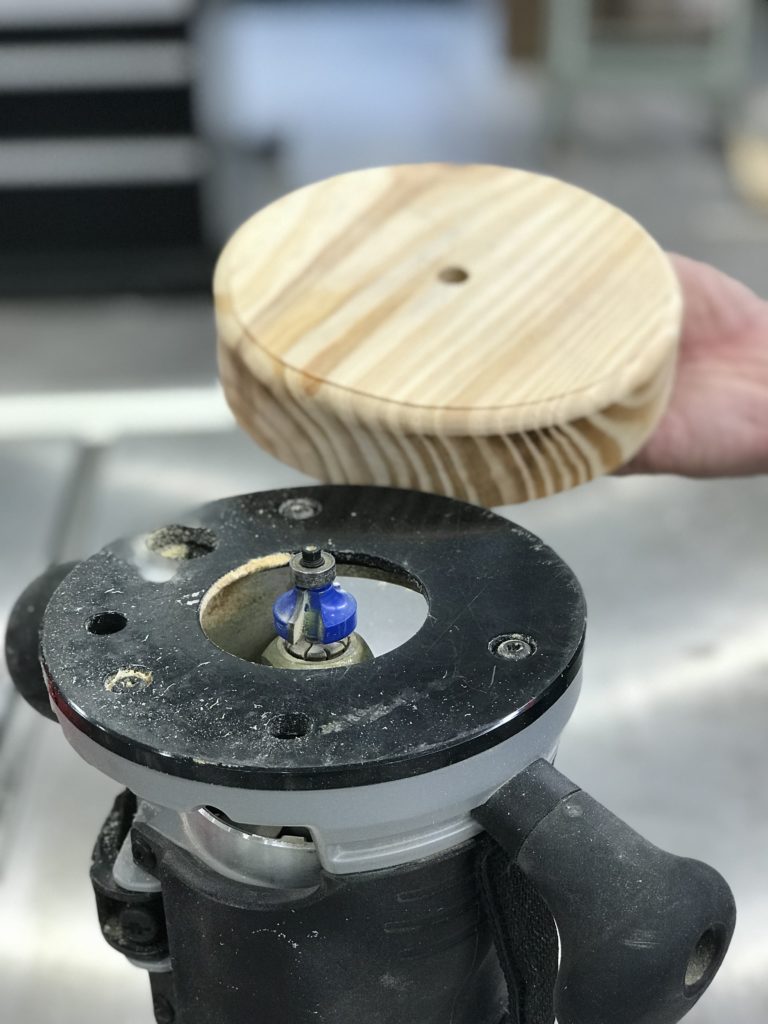
Step 8: Using a router and round-over bit, relieve the top edge of the 6” round circle on the side of the drilled hole.
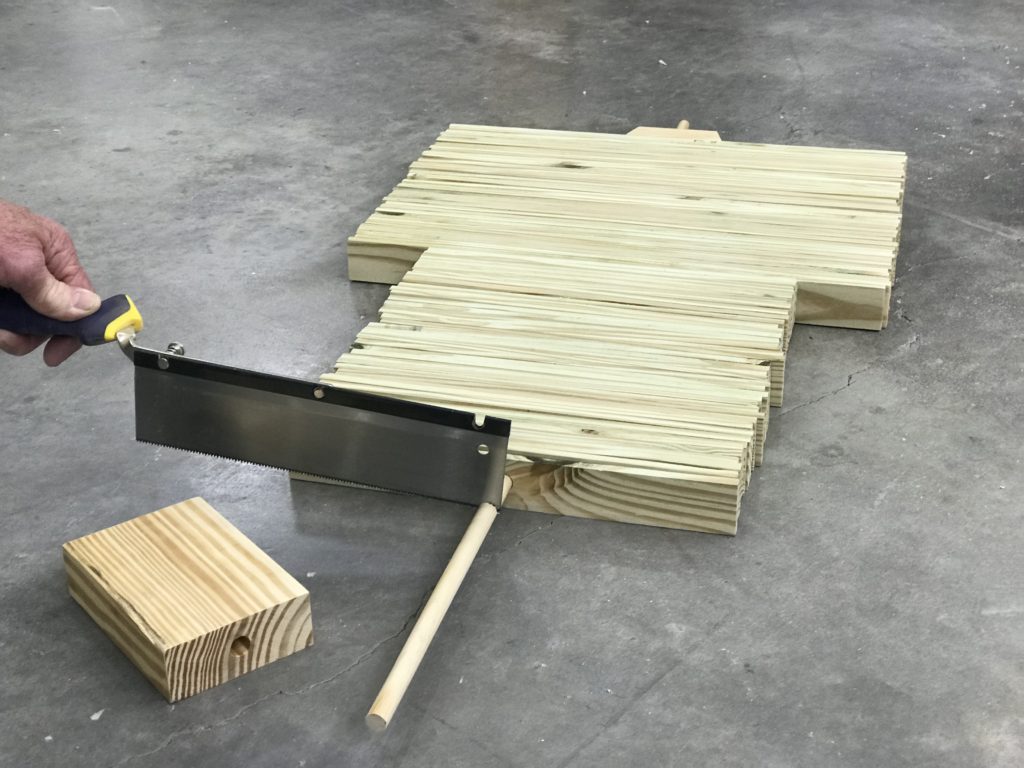
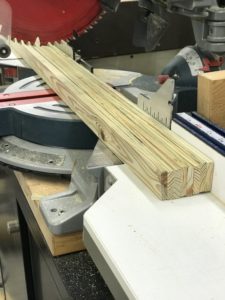
Step 9: Place the small rectangle on the large slat side of the tree and ensure 4” of dowel are hanging down below. Cut the top of the dowel off ¾” above the small slats as shown.
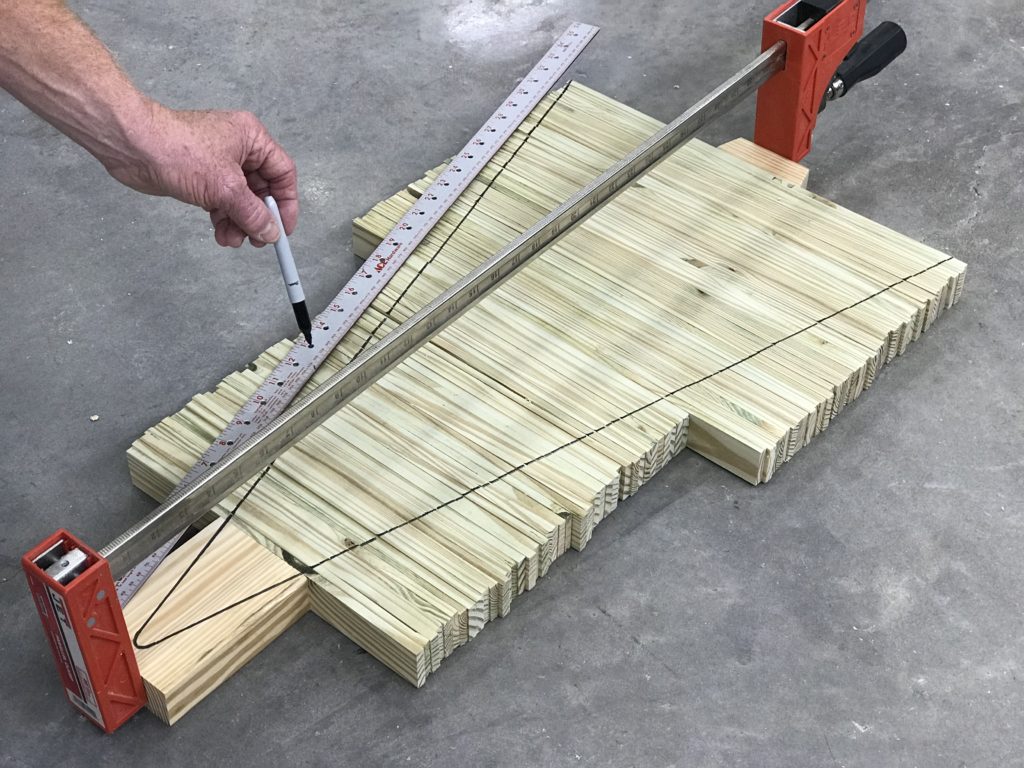
Step 10: Place small rectangle piece on the top of the dowel and press all the slats together with a long clamp. With a marker and straight edge, draw out the desired profile.


Step 11: Cut out the profile with a bandsaw or circular saw.
Step 12: Sand all pieces and finish as desired. Avoid putting any finish on the dowel, as that will affect the reinstall of the slats. We opted for a dark base and clear coat on the slats.
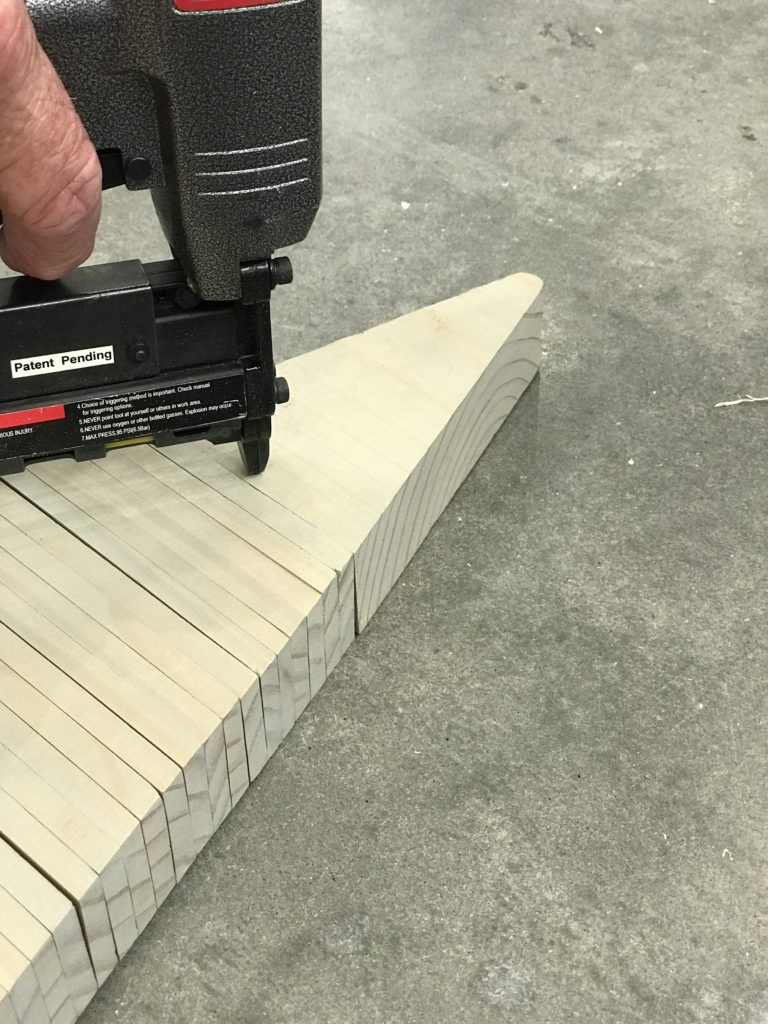
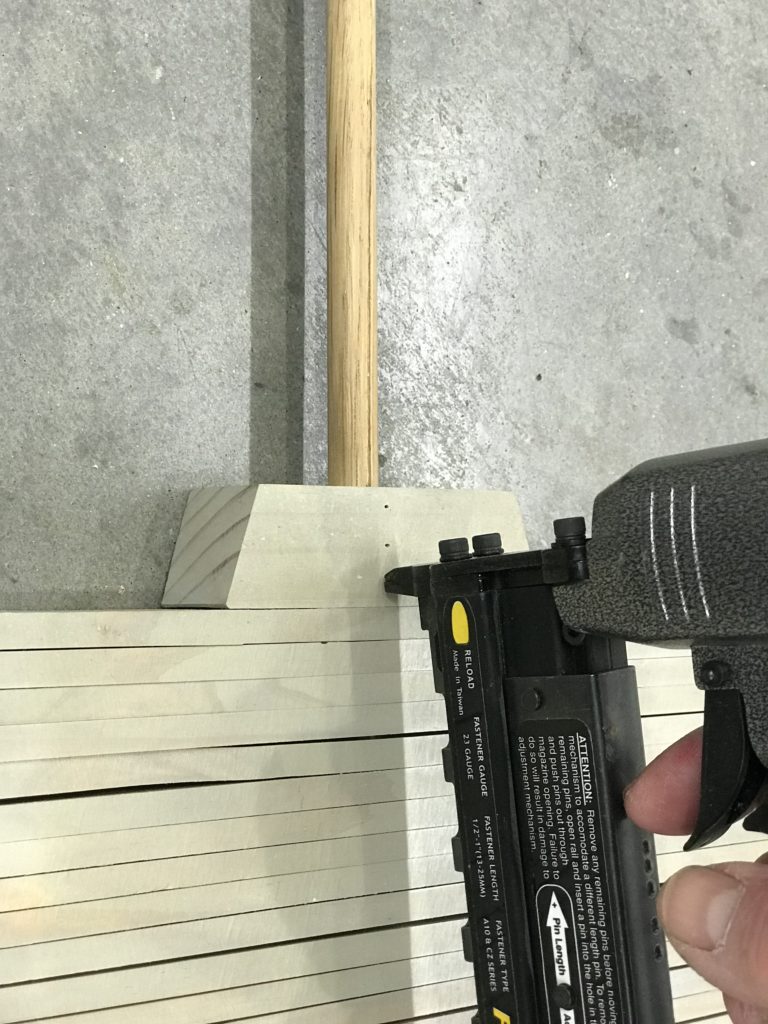
Step 13. Reassemble once finish is completely dry. Attach top triangle, lower stop and base with a micro pinner.

All done!
PRINTABLE INSTRUCTIONS
| Step | Instructions |
| 1 | Rip (14) ¼” thick strips out of the 2x4s. |
| 2 | Cut (40) pieces at 16” and (40) more at 12”. |
| 3 | Mark the centerline of all the pieces. |
| 4 | With a drill press or drill and ½” forstener bit, drill the center of every slat of wood. Using a fence guide will give the most consistent results. |
| 5 | Coat the dowel rod with soap and slide all the wood slats on with all like pieces together. |
| 6 | With the extra wood left in the 2×4 and small extra wood piece for the 6” circle, cut out the pieces at dimensions shown (rectangle 5″x3.5″, trapezoid 3″x4″, circle with 6″ diameter). |
| 7 | Drill a ½” hole 1” deep in the large rectangle and circle. Cut the hole all the way through the smallest piece. |
| 8 | Using a router and round-over bit, relieve the top edge of the 6” round circle on the side of the drilled hole. |
| 9 | Place the small rectangle on the large slat side of the tree and ensure 4” of dowel are hanging down below. Cut the top of the dowel off ¾” above the small slats as shown. |
| 10 | Place small rectangle piece on the top of the dowel and press all the slats together with a long clamp. With a marker and straight edge, draw out the desired profile. |
| 11 | Cut out the profile with a bandsaw or circular saw. |
| 12 | Sand all pieces and finish as desired. Avoid putting any finish on the dowel, as that will affect the reinstall of the slats. We opted for a dark base and clear coat on the slats. |
| 13 | Reassemble once finish is completely dry. Attach top triangle, lower stop and base with a micro pinner. |
